As part of ICHK’s Deep Learning program, I’ve been working with a group of 10 students over the past weeks, studying the wonder that is yeast. In this hands-on unit, which covers a total of 4 school days, students bake bread and brew beer (of both the ginger and alocholic varieties). Through these experiences student hopefully come to understand the joy of hands on making, as opposed to mere consumption. In addition, the unit includes independent travel and shopping, a range of practical and theoretical science, and an appreciation for a range of ancient human technologies.
Basic bread dough
Basic bread
Travelling
Pizza dough
Pizz toppings
Pizza oven
Enjoying pizza
Pizza baking
Back To School Brewing
Brewing beer
Hand milling grains
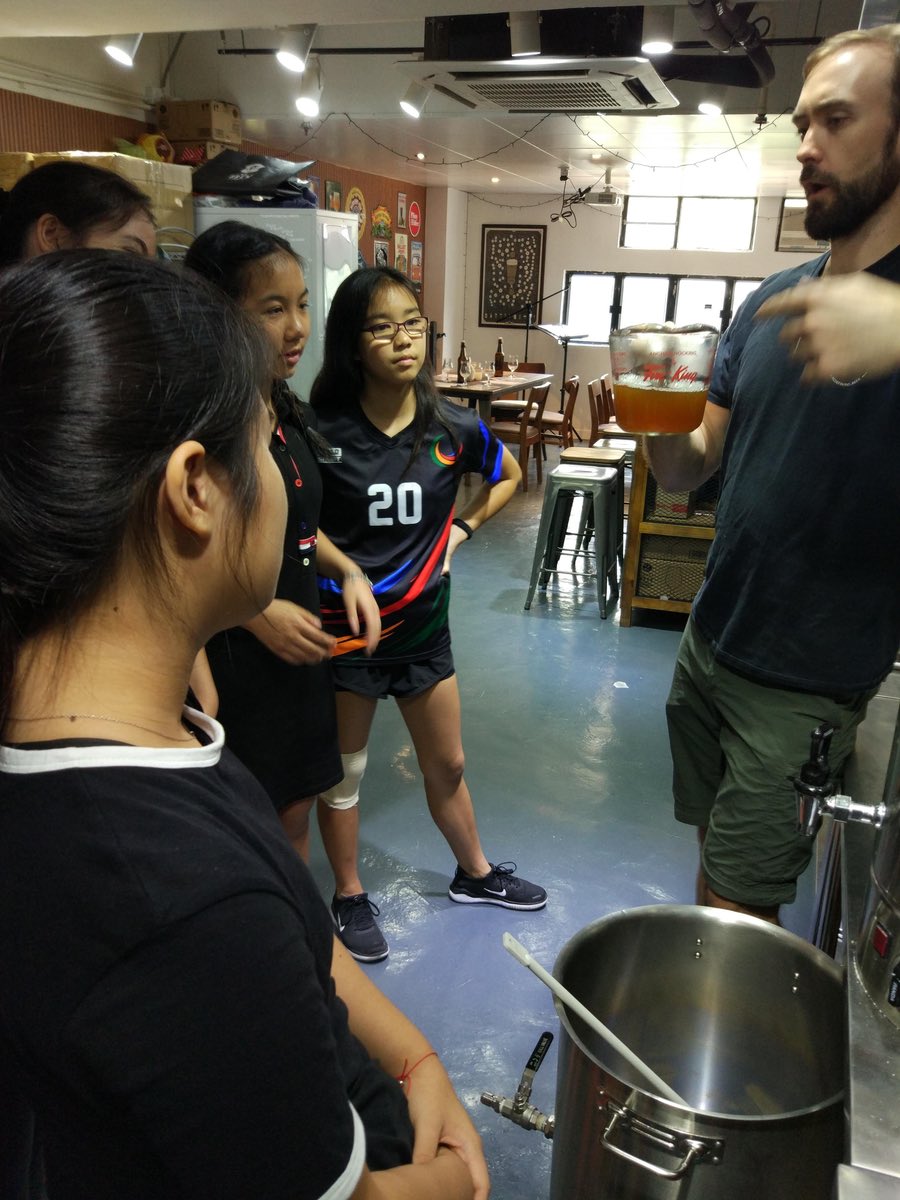
Tasting “wort”
Measuring density with a refractometer
Measuring density with a refractometer
Measuring density with a hydrometer
Hops
Bottling
Bottle capping
Bread and beer have been staples of human existence for thousands of years. In times gone by, bread offered a way to turn hard-to-digest grains into a nutritious, portable and tasty form. Meanwhile, beer offered not only nutrients, but also a way to purify dirty water in order to make it drinkable. Made from practically the same ingredients, the magic in these technologies is the use of yeast. This wonderful microorganism cracks open grains in order to eat hidden sugars. In its wake it leaves a supply of readily available nutrients, carbon dioxide (which makes bread fluffy) and sometimes alcohol.
According to some experts, many pre-industrial humans, children included, spent their days drinking low-alcohol beer, rather than water. How the world has changed! Today beer and bread are not as vital to human society as they once were, but they are still valuable technologies, both materially and socially.
As part of our Year 8 Human Technologies curriculum, we are asking students to consider not only the nature of truth, but also different types of truth (e.g. scientific, poetic, individual, etc). As one activity on poetic truth, we played students four songs, and asked them to sketch out a response to each song based on what they felt. Some students opted to write, and some to draw. One particularly interesting response came from Bethan, who really provides insight into how she responded to the songs. I wonder if the composers and musicians would recognise Bethan’s interpretation of their own poetic truth.
The songs are listed below, after which you can see Bethan’s work (click for a larger image).
The final session in this course! So far we have looked at what technology is, desktop basics, search and problem solving, graphic design, website design and coding. Although a real whistle-stop tour, the aim has not to go into great depth, but rather than get a sense of a range of different ICT arenas, issues and skills. Big picture stuff.
In this final session we will look at security and what ICT technology means for our children.
Security Threats
Hackers vs crackers
Who hacks and why?
Social Engineering
Kevin Mitnick was one of the world’s most famous hackers: when he was arrested in 1995, he was top of the FBI’s Most Wanted list. Whilst technically skilled, Mitnick is best known as a “social engineer”: essentially, talking and tricking people into giving him confidential information. The following video tells some of his story:
Eavesdropping
Traditionally, eavesdropping means to listen in to a conversation. Some modern versions include:
Man-in-the-middle
Keystroke logging
Password watching
Phishing
Phishing is the art of tricking people into going to a fake, parallel system in order to give up some confidential information. The video explains more:
Phishing attacks often make use of something called subdomains:
The domain name of the bank HSBC is hsbc.com.
HSBC can put subdomains in front of their domain, such as www.hsbc.com, banking.hsbc.com.
Only HSBC has the right to do this, as they own the domain.
However, there is nothing to stop me from buying safebanking.com (or similar), and putting hsbc infront of it as a sub domain: hsbc.safebanking.com.
If I use hsbc.safebanking.com in a phishing attack, I may trick people who see hsbc, and feel safe. However, those who understand how sub domains work, understand that because it is on the left of the domain, it is not the real HSBC, and so cannot necessarily be trusted.
Be careful about what personal data you share, especially geolocation information.
For example, if you take a photo in your house, and your phone adds your location (aka geolocation), you should not share this photo online, as someone can use it to find where you live.
ICT & Kids
A lot of people today worry about “the kids” in relation to ICT technology. This is an age old generational game…the last generation fretting over the moral development of the next generation:
“What is happening to our young people? They disrespect their elders, they disobey their parents. They ignore the law. They riot in the streets inflamed with wild notions. Their morals are decaying. What is to become of them?” Plato, 4th Century BC
In fact, a lot of people worry about technology in general: also not a new thing:
“[Writing] will create forgetfulness in the learners’ souls, because they will not use their memories; they will trust to the external written characters and not remember of themselves.” – Socrates, as recorded by Plato
The truth is, all technology is a trade off, and we have only limited control over the technological arc in which we live (you can get rid of your smartphone, but no one else will).
So, with the aim of finding some way to guide, rear, influence and inspire our own children, let’s consider the following collection of books:
As a parent and educator I ultimately take the following approach:
Kids are tougher and smarter than we give them credit for.
Kids like it best when we are honest and open with them.
It is not possible to protect our children from all danger (physical, moral, etc), and neither is it desirable.
Rather, we need to be aware of how, where and when our children are growing up, and give them the support and nurturing needed to deal with hardship and moral challenge.
Failure and hardship, combined with support and nurturing, give children a chance to develop positive character traits (e.g. grit, resilience, empathy) and make healthy decisions themselves. Highly restrictive rules do no.
Finally, whilst some parents find it hard to really look at youth culture (because we are old and boring), if you really want to understand kids, look at where their culture comes from (whether they engage with these sites directly or not):
Credits: image of plato by Ricardo André Frantz on Wikimedia shared under CC BY-SA. Book covers copyrighted by their respective owners, used under fair use.
Today we are looking at programming (aka coding), which is becoming a major educational focus for governments, schools, companies and parents alike. In this session we will consider what programming is and how we can approach learning it. Most of the session will be hands on, with you attempting to learn some coding.
Hailed as “the new super power”, coding is the ability to control a computer by writing software. This allows us to make an existing computer do new things, as is the reason why computers are so popular. This is summed up in the video below:
For a more detailed look at coding, and its attendant culture, it is worth reading Paul Ford’s Bloomberg essay What Is Code?. In short, though, changing the world use to take a lot of labour and capital, but now, thanks to code and computers, it takes much less. It is almost embarrassing looking at Google’s first storage server.
Let’s now consider some of the following items and ideas:
Is coding for everyone?
Ways to code
Binary/assembly (see Margaret Hamilton, who practically invented software working on Apollo)
High-level languages (scripting)
Block coding
Coding arenas:
Web
Mobile
Desktop
Systems
So, if you want to learn to code, how do you get started. Some of the following are good first steps:
Let’s use Scratch as an example, and work together to build a simple game. After which, you can choose one of the approaches above, and have a go at crafting some code.
Tonight we started off by talking about a couple of books of interest:
For The Win by Corey Doctorow – young adult fiction, set in the near future, investigating themes of power, politics, economics and poverty through the lens of gaming. Intensely absorbing, packing with learning and lots of fun.
How Children Succeed by Paul Tough – a study of the psychology, sociology and personality of success. Strongly suggests that character is more important than IQ when it comes to success, and that character can be both taught and learned.
When you arrived last week, I was watching The Internet’s Own Boy (a tragic true story I can’t recommend highly enough). Interestingly, it’s focus (Aaron Swartz) was good friends with Corey Doctorow (author of For The Win above) and Lawrence Lessig (founder of Creative Commons, which we have been using in our work).
Moving on, we used a new learning strategy, Free Learning, pioneered at my school, with the aim of increasing student motivation, freedom, passion, choice and independence. Free Learning was inspired by, amongst other things, the video below:
The 90 minutes rushed by..but it seemed you did not want to stop learning. Please feel free to continue with your free learning projects during the week.
No classes next week, but the following week we will move onto app design on Tuesday, and then our final session on Thursday.
Last week we worked through a Digital Scavenger Hunt exercise, which tested our problem solving, search and teamwork skills.
Today we are moving onto graphic design, and will use the following resources to look at the nature of creativity, and build something fun and new. Hopefully this will give you an insight into the way you and your children might use technology to be not passive consumers, but rather active media creators.
Working in collaboration with First Code Academy, I have been working to design and deliver a series of tech-focused workshops for parents. Dubbed the Parent Tech Briefing, these sessions are aimed to help parents understand the meaning of technology, become more fluent computer users and experience some of the opportunities their kids receive in school and at FCA.
This post will be used to capture and share notes of each session, for use by the participants as well as anyone else who has interests in these areas.
Session 1
In our opening session, the aim was to answer the question Why Technology Matters and then move onto look at some desktop basics. In looking at the issue of technology we took a whistle stop tour of the history of technology, its deep and central meaning to our survival and flourishing as a species and where it might be taking us (try not to think about this too much, it can feel scary for anyone with kids).
To get started, take a look at the slide deck we used to start the session off. Through these images we looked at the importance of technology to our past, and some of the problems it poses for us as a species. This was supplemented by the video below:
With a back story established, we moved onto some practical computer basics. These might seem very basic, but the context and details usually provide something for even the most advanced user. The notes below give a little summary of this segment (they are somewhat Mac-specific, but plenty applies to Windows too):
Desktop metaphor – we generally think that desktops are so called because they sit on a desk. In fact, the name comes from the use of a traditional desktop as a metaphor for how the computer works: we have a space, on which we can put files, folders and various apps. We can drag and drop: a simulacrum of moving things around with our hands. The video below illustrates this quite nicely:
WIMP – in a desktop environment we find windows, icons, menus and pointers: the four essential elements that make up a desktop’s Graphical User Interface (GUI). This is very different from older computers that offered only a Command Line Interface (CLI). CLIs are super fast and powerful, but very time consuming to learn. Conversely, GUIs take more time (a mouse is slower to use than a keyboard), but easier to investigate and learn as you go.
Clicking – everyone knows how to click a mouse, but these distinctions are often lost on users:
Single left click – aka primary click, this is used to select things, open links, etc.
Double left click – this is often over used, but in fact is generally only useful to open icons (but not links, buttons, etc) and to highlight a word.
Right click – aka secondary click, this is used to show a context menu. This can be done with two finger click, clicking with one finger whilst holding the control key, or natively on the right side of the trackpad (if you enable it in System Preferences).
Mission Control – on a Mac, window management is a little tricky, until you discover Mission Control (which used to be called Expose). You can initialise Mission Control by clicking F3 or swiping up with three fingers. You can also create new virtual desktops here, spreading your windows across more space.
Trackpad Gestures – modern computers (both Windows and Mac) are learning from mobile devices (phones, tablets), and now support some great gesture controls via the trackpad. On a Mac, try these:
Scrolling – two fingers up and down.
Mission Control – three fingers up and down.
Desktop switch – three fingers left and right.
Show/hide desktop – “exploding claw” in and out.
Files & Folders – files contain data (text, images, video, music, etc), and can be renamed to make it easier to search for them. Folders can contain sub folders and files, allowing us to create a hierarchy of organised content.
Spotlight – this Mac search function, which we can launch using command-space on the keyboard, can be used to quickly launch applications, find and open files, define words, calculate sums…and as of El Capitan (10.11) even get exchange rates. Really helps to work faster.
Keyboard Shortcuts – although the pointer is powerful, it is much slower than using the keyboard. We can use special keyboard combinations to shave time off each part of our work. This really adds up over 40 years! Remember, cheat sheets can help us learn and remember these tricks.
Hot Corners – this Mac feature lets us assign functions to the corners of the screen, so we can (for example) put or display to sleep just by touching a screen corner. Go to > System Preferences > Mission Control > Hot Corners to enable this.
Dock – the Mac dock is useful, but takes up precious vertical screen real estate: try hiding it, or moving it to the side in order to get more out of your display.
Quitting Apps – and finally…Windows quits applications automatically once the last window in that app is closed. Mac does not, keeping them handy for quick opening in future. This is great, but having too many apps running fills your RAM, slowing down the whole computer. If you have more than (roughly) five apps open, you might start to notice performance dip. Look for the little dot beside dock icons, indicating an app is still running. Quit apps in the top menu (File > Quit), or by right clicking the dock icon or using the command-q shortcut.
This was a busy session, with lots of learning. Try and find some time during the week to practice these skills before we meet again.
Image credit: Monkey image from Wikimedia Commons, CC BY-SA
Strimming, weed whacking, weed eating, call it what you like, it’s a crazy process. Take a piece of nylon string, use a 2-stroke petrol engine to spin it around real fast, and then use that force to hack away at vegetation. As part of my Art of Physical Labour programme, I try to get students to understand machines, how they are useful, why they are potentially dangerous, and what their limitations are.
So, after a session of hand weeding, I thought I would introduce something new, and have students look at, pull start and (for the more responsible) use a strimmer. If you have never used a strimmer before, you could be forgiven for underestimating how intimidating they are to new comers. It’s not just the danger of being lacerated, but also flying stones, the noise of a 2-stroke engine, the heat, fumes, vibration. This is not something to approach lightly.
At first sight of the strimmer, students were excited by the prospect of using a power tool, but at the same time I could see some trepidation from some of the younger kids. I asked them some questions as to what this thing was, how it worked, and why it could be dangerous. We discussed the measures we could take to protect ourselves, including being sensible, knowing the machine, wearing safety goggles, long trousers and closed toed shoes. For extended use we discussed the importance of ear protection, and on sandy ground, or when going right down to the ground, the importance of a heavy apron.
Each student then had a turn starting the strimmer, using the pull cord to manually ignite the full. This is not an easy process, and every student in the group underestimated the force required. After starting, students used the kill switch to stop the machine, which we also discussed in terms of safety. Once all of the students had a go starting the machine, three students were selected to whack some weeds. I worked individually with each of them to make sure they machine was handled correctly. I helped them load the started machine onto their backs (not as easy as it sounds), and then worked to direct them to safely operate it (form a safe distance of course). All three students clearly enjoyed the process, but came away a little shaky at the power and heat of the machine.
All too often, schools attempt to keep students safe by banning supposedly risky activities. However, this is a very short-term fix, as students are shielded from potential danger, and so never learn how to judge, mitigate and handle danger. I love this activity precisely because it exposes students to danger in a well managed, safe way. They learn to appreciate the danger of powerful machines, but also that this power can be harvested and used wisely.
Next lesson? Power drills, working up to hammer action.
Image Credit: Strimmer image by David R. Yeo on Wikipedia, shared under CC BY.
In Year 7, my students undertake a short unit of work called Epic Wallpaper, in which they attempt to make a glossy wallpaper using Acorn and some graphic design techniques. This is the first year I have run this unit, and it went very well, with the students really enjoying the creativity of image editing. The 9 best designs are shown below. All are under Creative Commons licenses, so feel to download and use them as your wallpaper.
All images are 1680 x 1050px and so should work on most commons screen sizes. Well done to Alex, Alvin, Emi, Jamie, Lily, Nicolle, Ruby, Sammi and Serena for their fantastic design work.
Looking back on my own time in secondary school I remember, in terms of useful practical outcomes, precisely one lesson. Of course there are many more which influenced and shaped me, but only one that I regularly and knowingly draw on. It was Year 9 Science, and for reasons I did not understand at the time, the wonderful Dr. Myatt taught us how to wire an electrical plug. Nothing earth shattering, but something that I have needed to do many times, and which really taught me a lot about electrical safety.
With a lesson in hand for two of my Year 9 ICT classes this week, I decided to take a leaf out of Dr. Myatt’s book and teaching plug wiring as a one-off lesson. Hopefully they will take away as much from this experience as I did from the lesson that inspired it.
The Supplies
Focused
Hard A Work
Having Fun
Word In Progress
Cleaning Up
Resources
In planning the lesson I needed to obtain the following:
5x flat head screw drivers (which I did not use in the end)
10x scissors (good quality is key, more would be useful. I chose not to use wire strippers as I wanted kids to use simple household tools for the job)
1x roll of electrical tape
1x 10m length of electrical wire
1x square 9V battery
Some of this was scrapped from existing school supplies, other items were purchased new. In the end, we spent a meagre HKD $260, which I thought was very good value for money. Before the lessons began I cut the cable into 50cm lengths, and the electrical tape into 9cm segments. I arranged the tools and equipment at a table that the whole class could gather around.
Why Bother?
I try to start all lessons and units with what I call “The Pitch”: one or more reasons for students to be interested in the lesson. In this case, I mentioned that students will most likely end up buying devices in different countries, and that this skill will help them avoid having to constantly find travel adapters in order to their various appliances. I also mentioned the joy of being able to solve such household problems independently, and the time and money this can save.
Safety
In approaching this subject my primary concern was that of safety: making sure the students took the activity seriously, understood the risks and would not come to any harm. To get the point across I asked for a brave volunteer to press a 9v battery against their tongue. With a new battery this can be quite a shock, so I used an older one, with a little less juice in it. The students were apprehensive, but eventually a brave volunteer came forward. He took a risk, experienced some discomfort, and entertained his classmates. I then explained that this 9v battery was less than 5% of the strength in our 220v sockets. To really get the attention of the students I showed the first 30 seconds of the macabre video below (warning, people die, it is unpleasant):
A few kids laughed, which I quickly put a stop to. Most appreciated the awesome power that we were dealing with, and it was a good chance to discuss that fact that you never touch someone being electrocuted without insulation, in order to avoid becoming a victim yourself. From here we looked at the new plugs, and I asked them to consider why the earth pin is the longest (so that the plug is earthed before any power enters the system). We also discussed the purposes of fuses, and I showed them the location of the fuse within their MacBook chargers.
The Process
I then gave the class a quick demonstration of the process involved in rewiring a plug (watch this video if you want more detail, or don’t want to risk a live demo):
Unscrew the top case.
Remove the cuff/cable clamp (which holds the electrical cord in place)
Strip around 3-4 cm (depending on the plug design) from the end of the outer layer of the cord.
Cut the earth wire (green and yellow) to fit the available space, and then strip away 5mm of insulation from the end of the earth wire.
Attach the earth wire to the earth pin.
Fix the electrical cord to the plug using the cuff.
Repeat Step 5. for the remaining wires (remember, the BLue cable goes in the Bottom Left, and the BRown cable in the Bottom Right).
Make sure there are no lose wires, and the case fits snuggling on top.
Screw the case into place
As a final safety precaution, I had students insulate one end of their cables with electrical tape, before starting. The idea being that if anyone did plug in their finished product (which I explicitly forbade), the risk of electrocution would be greatly reduced.
Hands On
All of this had taken around 15 minutes, and the students were keen to get started. They almost all seemed to enjoy the process, and those who generally do not enjoy ICT seemed more motivated than usual. Many found it hard, tiring and frustrating, which I was secretly thrilled with: nothing like struggling through things to appreciate what you have. The class was active, with a lot of questions from students, and plenty of quality control on the teacher’s part. After 50 minutes working time, about a third of students had finished, whilst the rest were very close. This gave us 5 minutes for students to tidy up, leaving me to disassemble the work before the next class came in (this did take a while). Some students opted to stay behind during break to finish up their work, which was great to see.
Final Thoughts
Ideally, with more time, I would have had all students finish the assembly, and then disassemble someone else’s work (for informal peer assessment purposes). I would also have liked to have some power packs and light bulb, so we could have tested the plugs. However, this was beyond what I had time and budget to arrange. Overall, both lessons went very well, the kids enjoyed themselves, and I will definitely add this to the curriculum for future years.
 As part of ICHK’s Deep Learning program, I’ve been working with a group of 10 students over the past weeks, studying the wonder that is yeast. In this hands-on unit, which covers a total of 4 school days, students bake bread and brew beer (of both the ginger and alocholic varieties). Through these experiences student hopefully come to understand the joy of hands on making, as opposed to mere consumption. In addition, the unit includes independent travel and shopping, a range of practical and theoretical science, and an appreciation for a range of ancient human technologies.


 Working in collaboration with


